
Ever wish there was a magical button to make your social media game strong without the hassle? Well, guess what? Meta Business Suite can be your new BFF in scheduling and publishing posts stress-free.
I know – juggling patient care and social media is no joke. I used to wish for more hours in the day just to keep my online game strong.
But guess what? Meta Business Suite made managing my social media posts easier without the last-minute panic and scrambling.
Today, I’m sharing this game-changing approach with you and taking you through the exact steps I took to up my social media game while keeping it real and relatable.
I’m stoked to share my journey with you and spill the beans on how scheduling posts has become my secret weapon.
Step-by-step Guide on How to Schedule Your Chiropractic Social Media Posts via Meta Business Suite
Why bother, you ask? Because your online presence matters. Social media is important to share your ideas and build relationships with your community.
I’ve cracked the code on how Meta Business Suite can make it a breeze. Check the steps below:
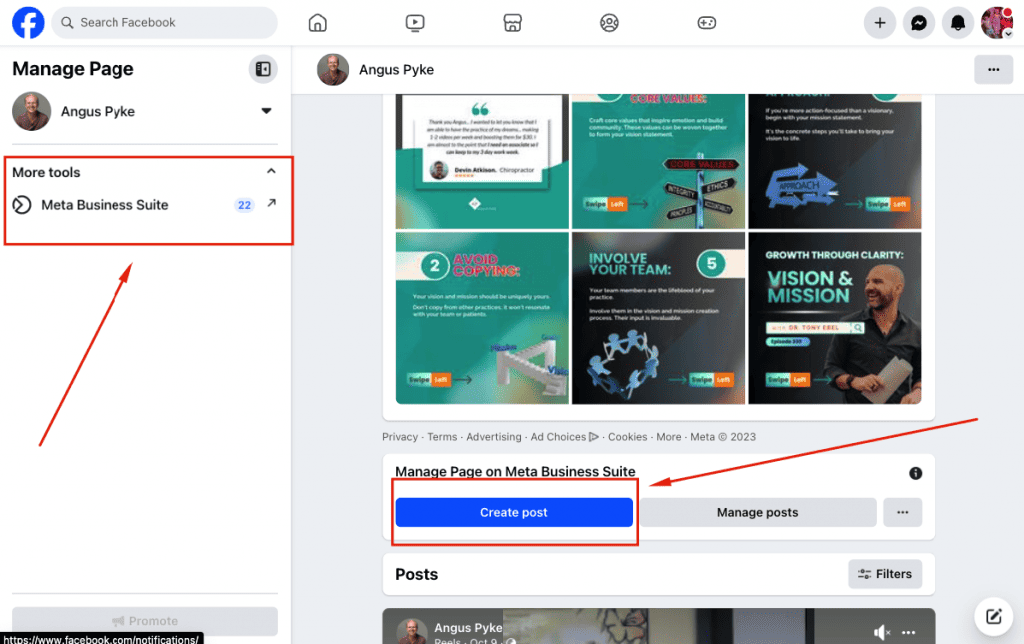
Step 1: Access Your Facebook Page:
- Begin by navigating to your Facebook page.
- Click on the specific page where you want to make a post.
Step 2: Initiate Post Creation:
- Scroll down to locate the “Create Post” button and click on it.
Alternatively, click on “Manage Post,” which will redirect you to the Meta Business page.
- Scroll down to locate the “Create Post” button and click on it.
Step 3: Create a New Post on Meta Business:
- Upon clicking, you’ll be directed to the Meta Business page’s post-creation interface.
- You can proceed or click on “X” to explore different views.
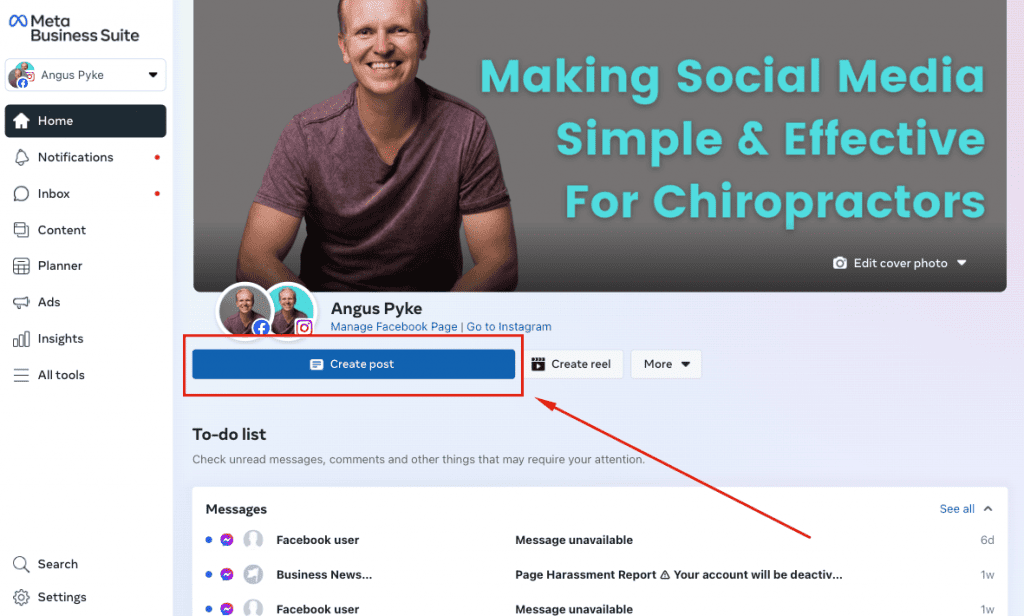
Step 4: Access Content Page: From the Content Page, click the “Create Post” button at the top right corner.
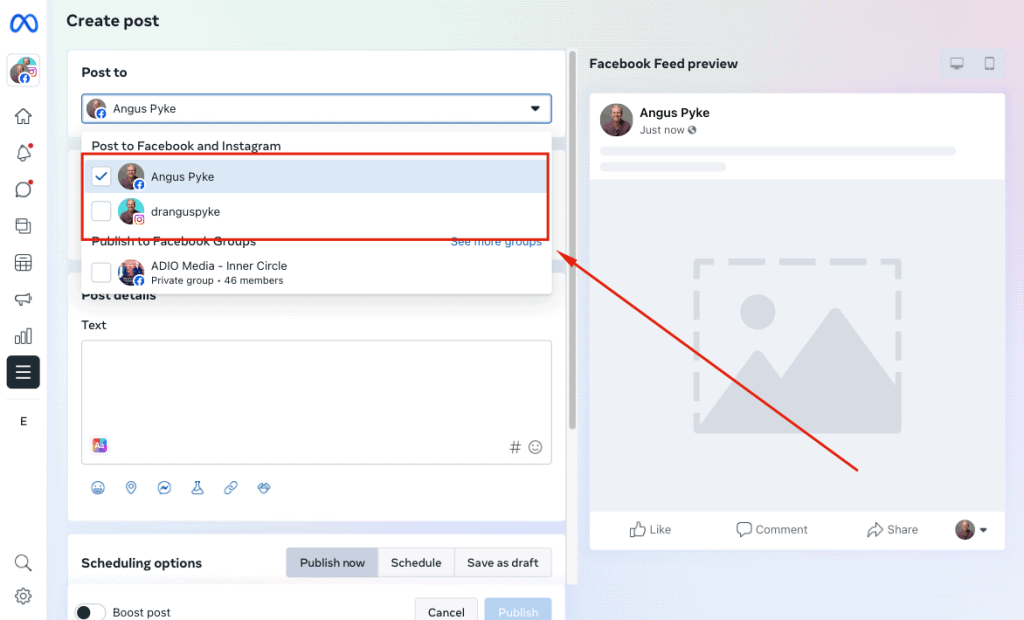
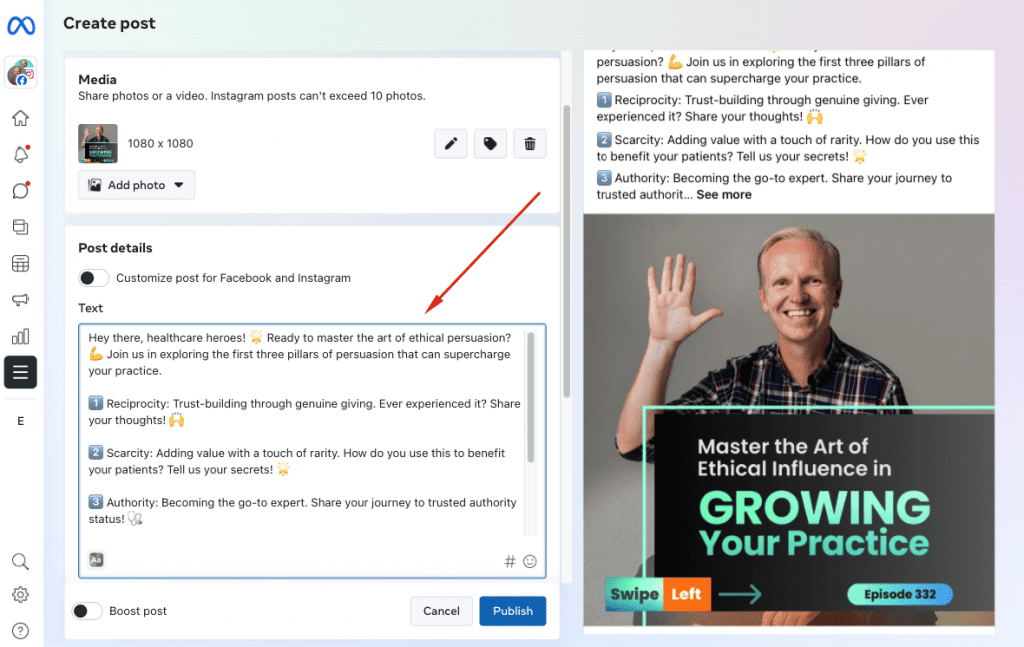
Step 5: Enter Post Information: A new window will open, allowing you to input your post information.
Step 6: Select Profiles and Upload Media:
- Choose the profiles for both Facebook and Instagram where you want to post.
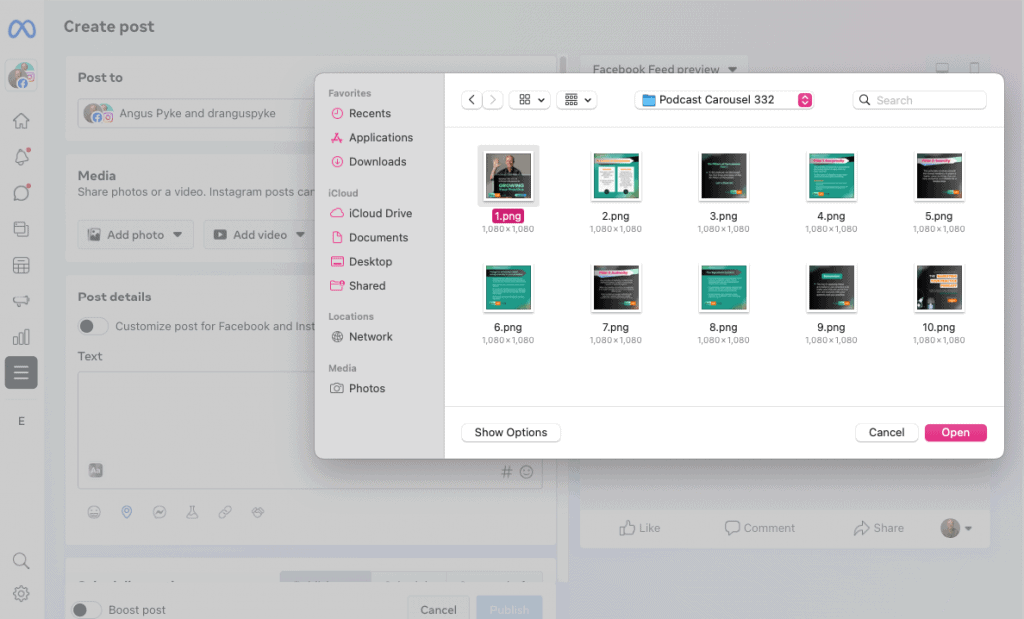
- Add a photo or video file for your post.
Step 7: Upload Carousel Post (Optional): If creating a carousel post, carefully check the order of the pictures before uploading.
Step 8: Create and Format Caption: Enter your caption under the “Text” section, ensuring proper formatting.
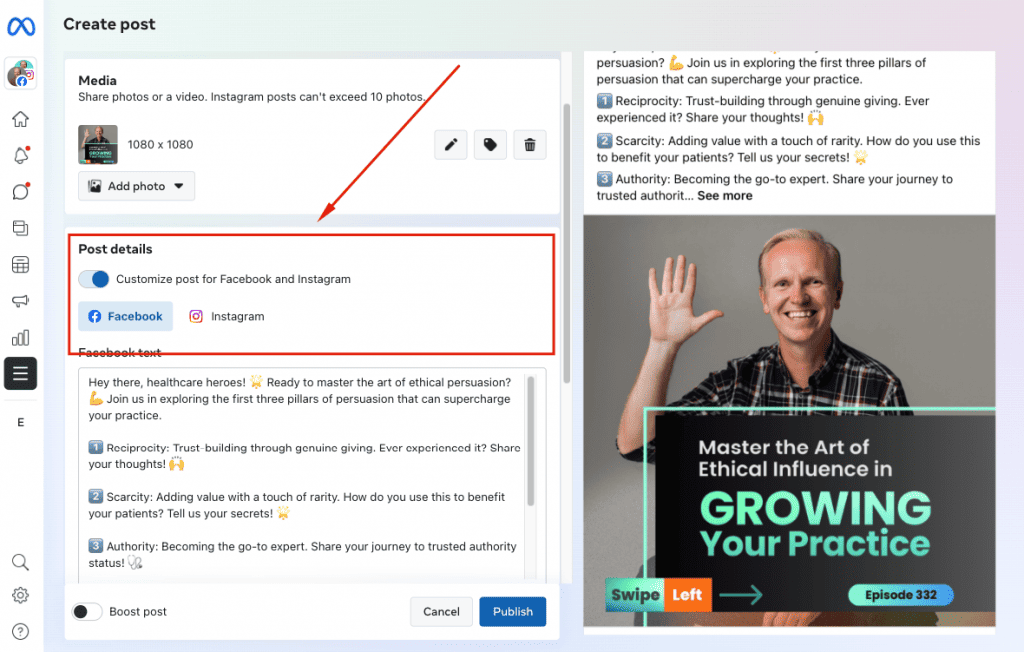
Step 9: Customize Post for Platforms: Customize the post separately for Facebook and Instagram if needed.
Step 10: Choose Posting Option: At the bottom, select from the options to “Publish Now,” “Schedule,” or “Save as Draft.”
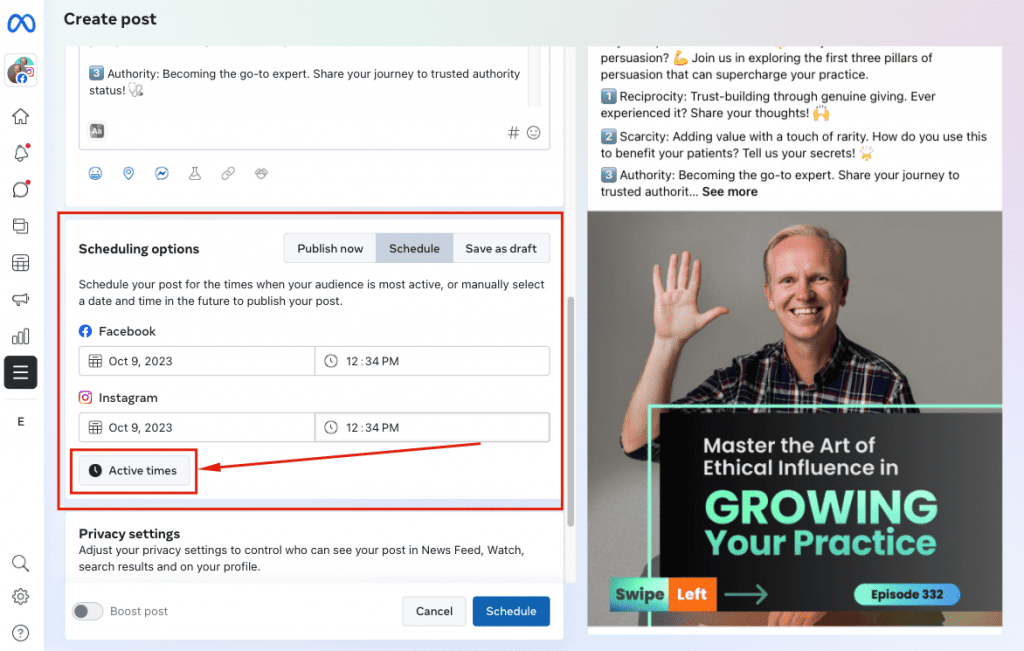
Step 11: Schedule Your Post:
- To schedule, click on “Schedule.”
- Choose Meta’s suggested active times or set your preferred time.
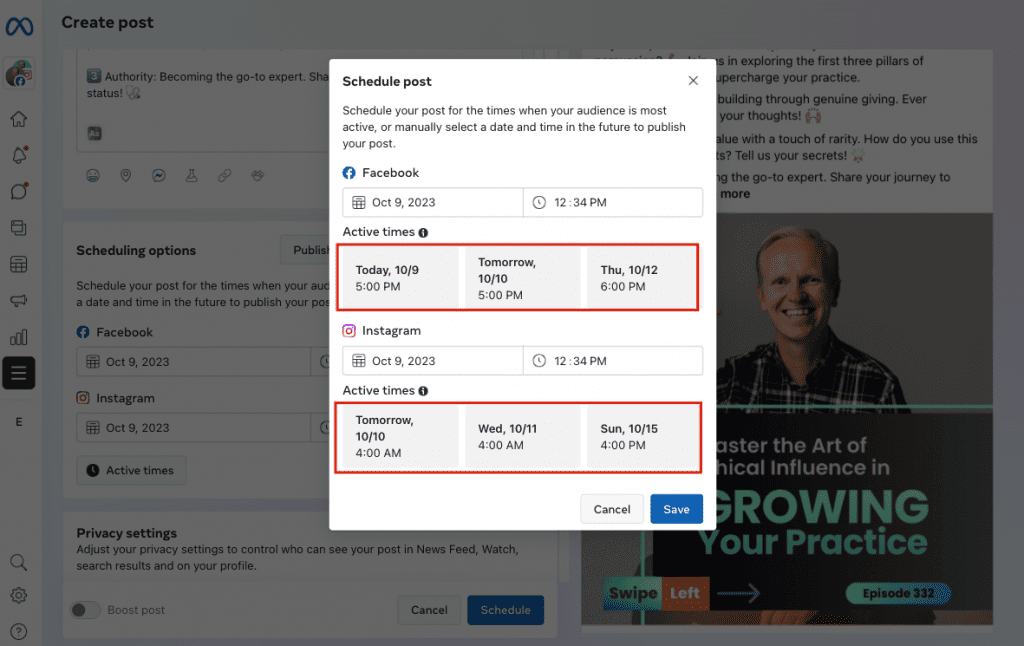
Step 12: Finalize and Save: Once the time is set, click “Save.”
Step 13: Review and Confirm:
- Review the post details to ensure accuracy and order.
- Click “Schedule” to confirm.
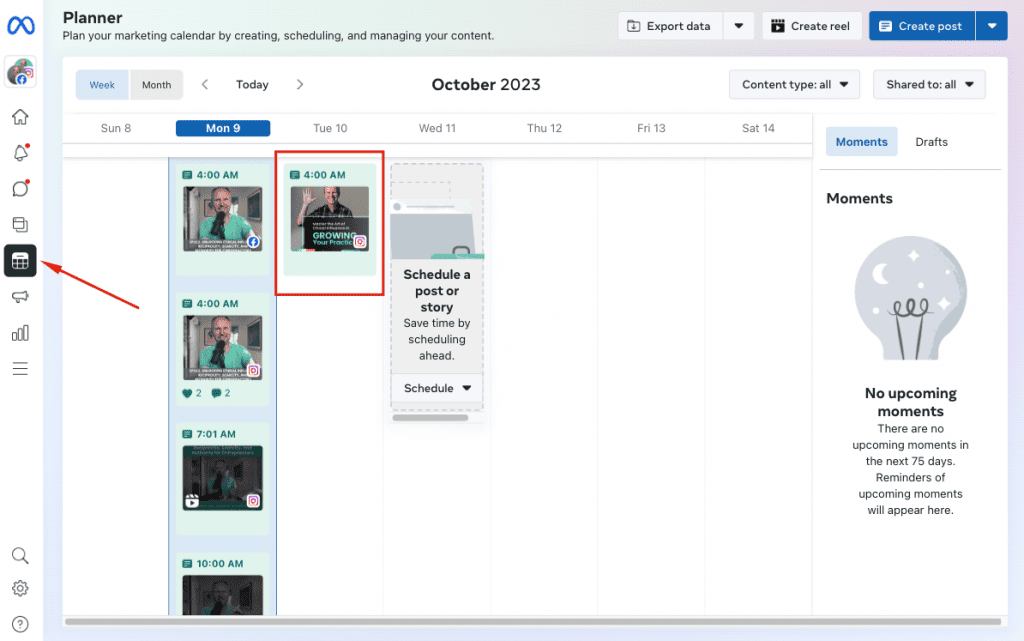
Step 14: Check Planner/Calendar View:
- After processing, the scheduled post should appear in your “Planner/Calendar” view.
- You can also find it in the “Content” view under Scheduled items.
You’ve Successfully Scheduled Your Posts Using Meta Business Suite
And there you have it, chiropractic pals! ???? You’ve just mastered the art of scheduling posts with Meta Business Suite, and trust me, your online game is about to reach a whole new level!
It may seem like a lot of steps but as you get more familiar, you’ll see that it’s not that complicated.
Remember, this isn’t just about posting—it’s about creating a genuine connection with your audience. Share those chiropractic insights, sprinkle in a bit of personality, and watch as your online tribe grows.
Feel free to drop your thoughts or share your wins in the comments below. Here’s to a thriving online presence and many more happy spines!
Recent Comments